Once a Jira record is ready for signatures, it can be routed for approval directly within Jira using the steps below.
| Info | ||
|---|---|---|
| ||
The roles and number of signatures that are required to approve a Jira record are enforced according to predefined approval routes. These approval routes are based on attributes of the Jira record and can be configured by VERA Administrators via the Approval Policy. |
Routing for Approval from details view:
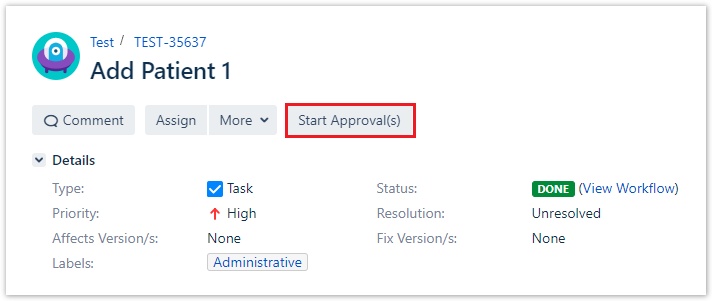
Navigate to the Jira record you want to route for approval
Select the Start Approval(s) button at the top of the page
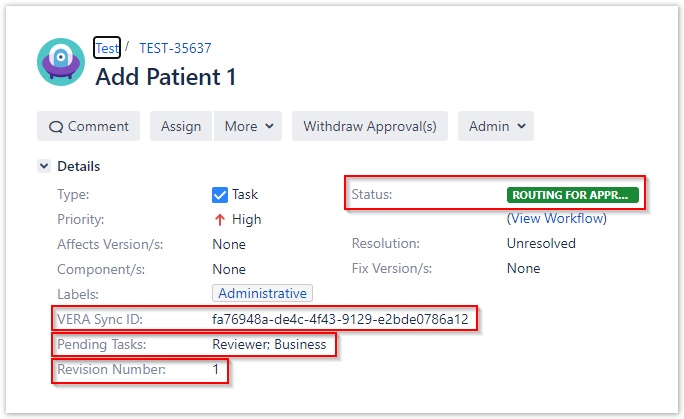
The record will update to display the following:
The Status will update to Routing for Approval
The Pending Tasks field will show the roles that need to provide their approval via electronic signature
The VERA Sync ID field will be populated with a unique VERA identifier
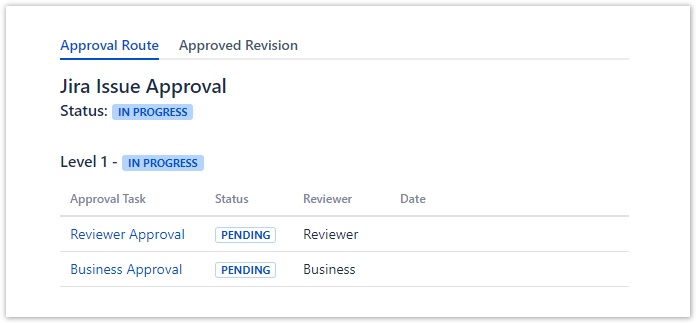
The VERA Approval Route panel will display the approval route and roles with pending tasks
The Revision Number field will be populated with the current revision number from VERA.
| Note | ||
|---|---|---|
| ||
You may need to refresh the screen for the Pending Tasks, VERA Sync ID and VERA Approval Route panel to populate. Both the Pending Tasks and VERA Sync ID fields will not be editable in any state. These are read-only fields used by VERA to display information. |
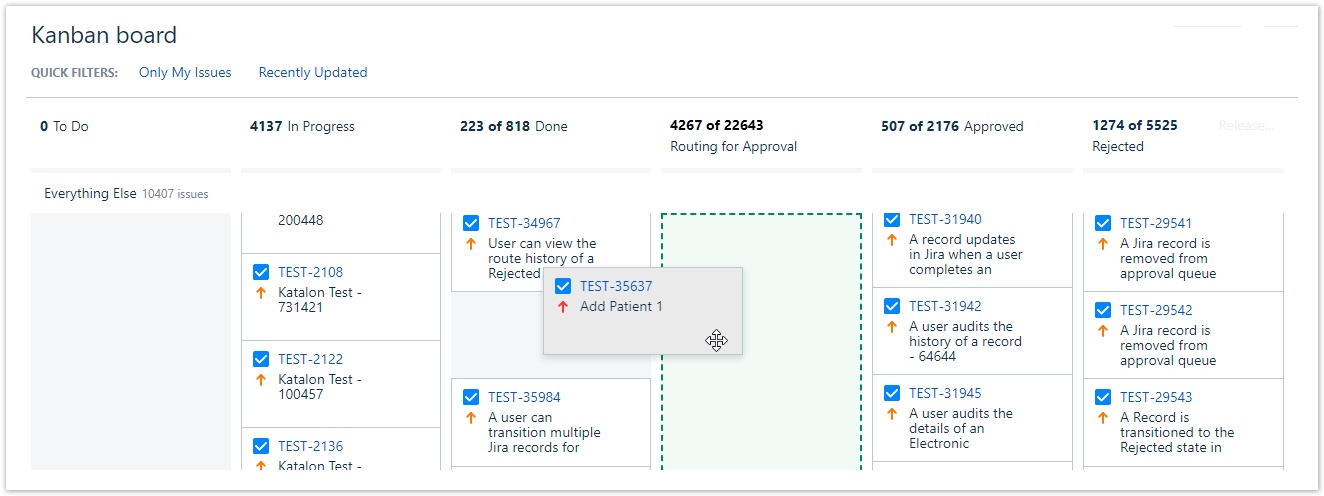
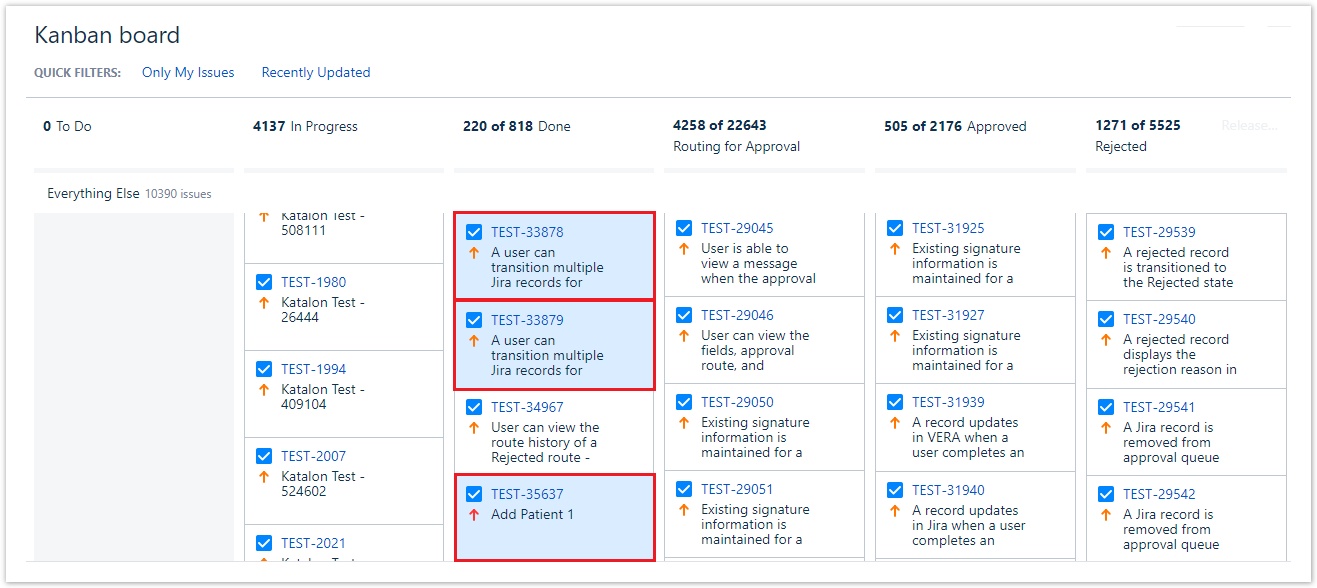
Routing for Approval from board view:
- Click on the Boards dropdown in the navbar and select the board
- Locate the Jira record you want to route for approval
- Drag and drop the record into the Routing for Approval column
Routing multiple records for Approval:
Select all records you want to route for approval
- Click the CTRL button on your keyboard and select multiple records to bulk select
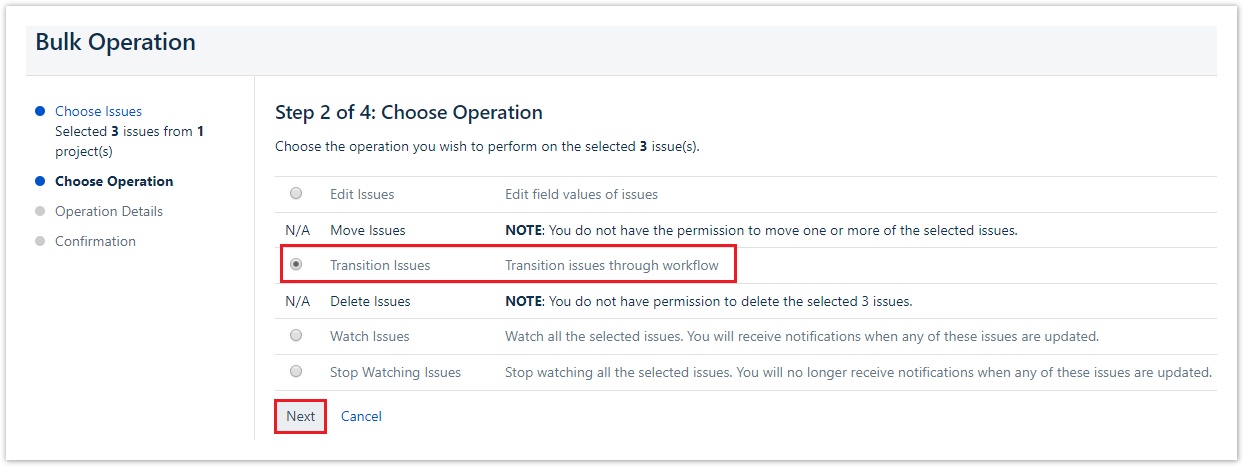
Right click and select Bulk Change

Choose the Transition Issues option and click Next
Select the Start Approval(s) workflow action and click Next
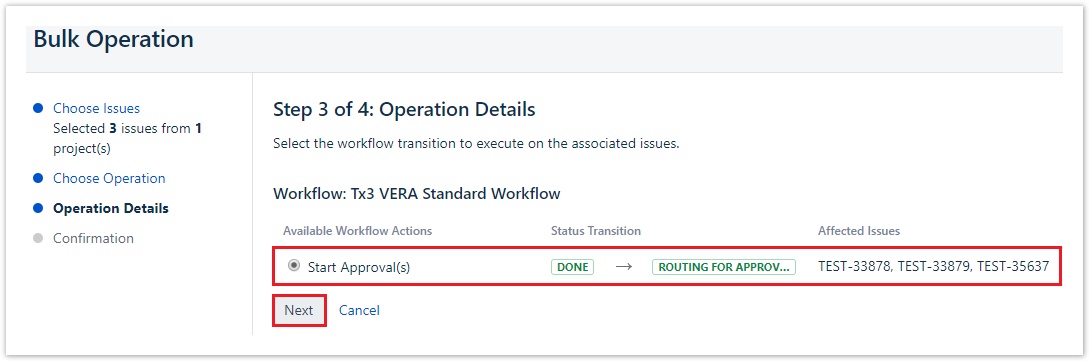
Verify that the fields are correct and click Next

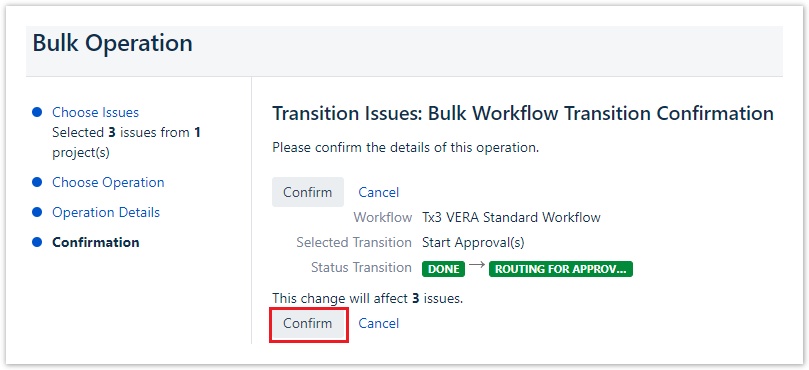
Click Confirm to complete the bulk transition
Viewing the Previously Approved Revision
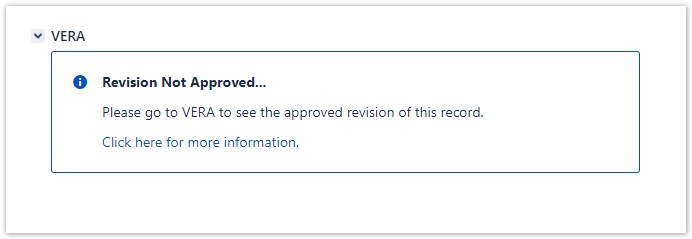
If a record has been fully approved in VERA and then revised in Jira, there may be differences in the current data of the record and the approved data. A link to the previously approved revision is available in the VERA panel in Jira.
The displayed message will depend on the status of the record in VERA.
- If the record is currently editable (i.e. not routing for approvals, rejected, withdrawn from approvals or approved), then the VERA panel will display a message indicating that the record is not the approved revision and will include a link to the previously approved revision.
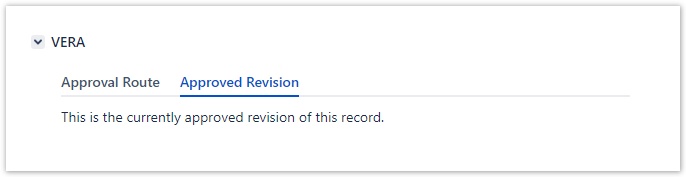
- If the current record revision has been routed for approval, but not approved, VERA will displayed the approval route and a message with a link to the previously approved revision.
- If the current record revision is the latest approved revision, then the message will indicate this.

Related articles
| Filter by label (Content by label) | ||||||||||||||||||
|---|---|---|---|---|---|---|---|---|---|---|---|---|---|---|---|---|---|---|
|
| Page Properties | ||
|---|---|---|
| ||
|
Table of Contents
Table of Contents maxLevel 2