A record that is routing for your approval can be rejected using the steps below.
Step-by-step guide
- Navigate to the record that you want to reject in the appropriate System of Origin
Make sure the record is in the Routing for Approval state
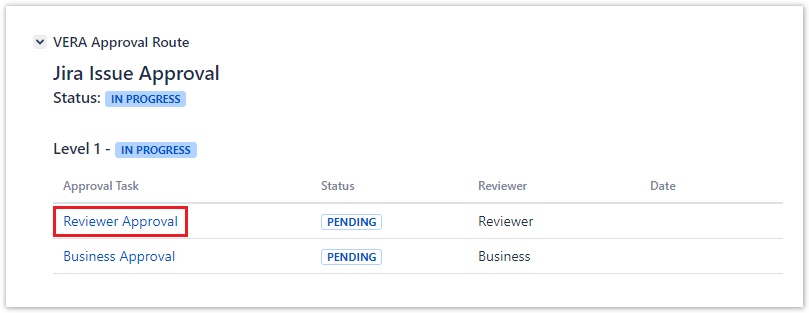
Expand title Jira Approval Task Links Select the Approval Task that you want to review from the VERA Approval Route panel. You must be a member of the Approval Group (under Reviewer) to approve or reject the record.
Expand title qtest Approval Task Links 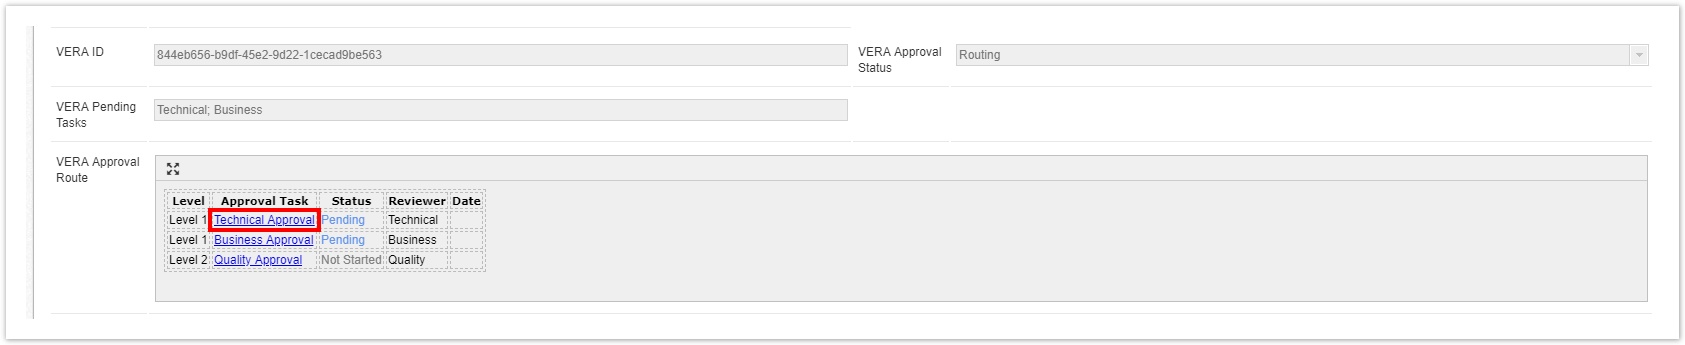
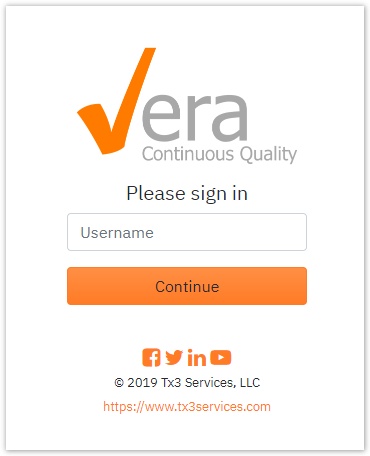
Login to the VERA Web Portal with your credentials
- If you are already logged into VERA, you will be redirected to the Approval Task Details page
- If you are already logged into VERA, you will be redirected to the Approval Task Details page
- Once logged in, the Approval Task Details view for the Jira record is displayed
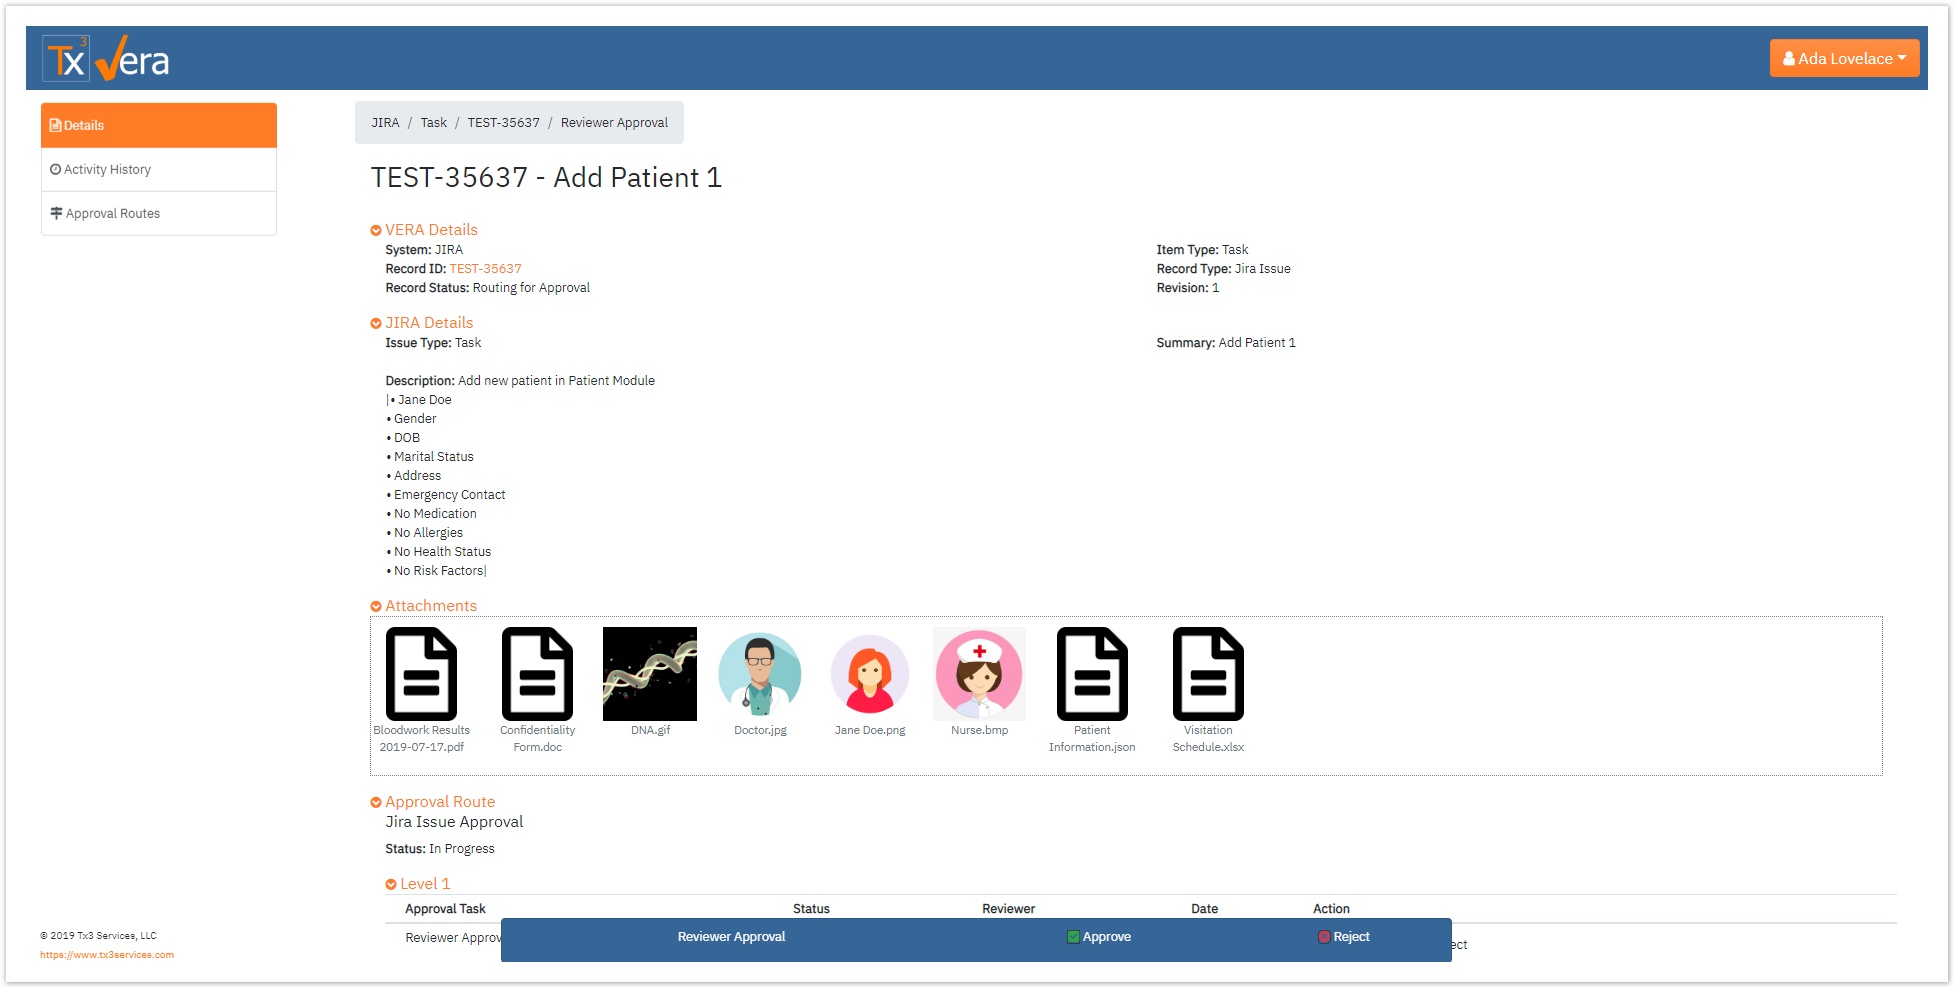
- Review the details and click either of the
 buttons to reject the record.
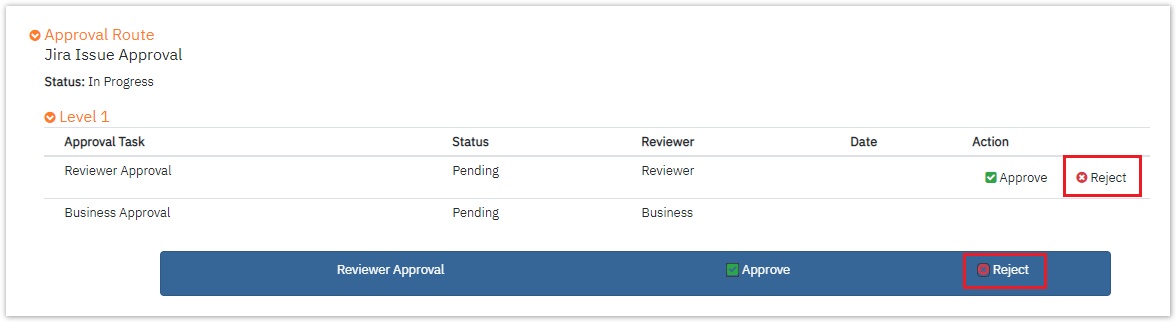
- Enter a rejection reason and click Submit.
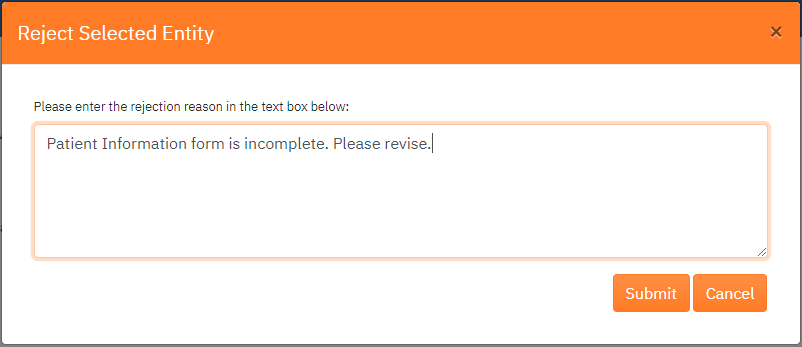
- Upon submission, the entered electronic signature is applied along with the rejection reason.
The Approval Route section in the VERA Web Portal is updated as followed:
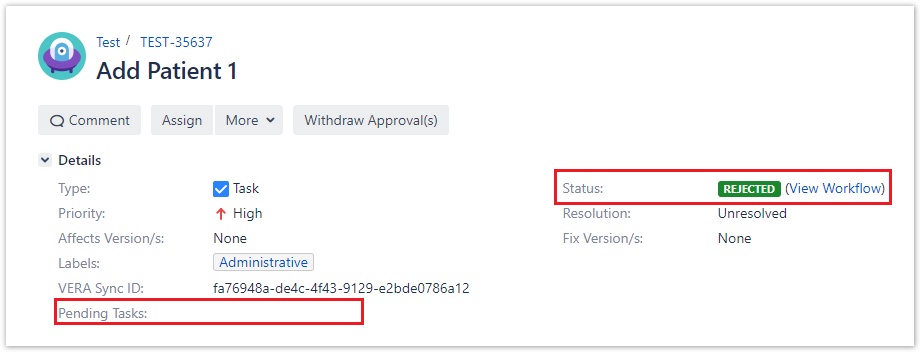
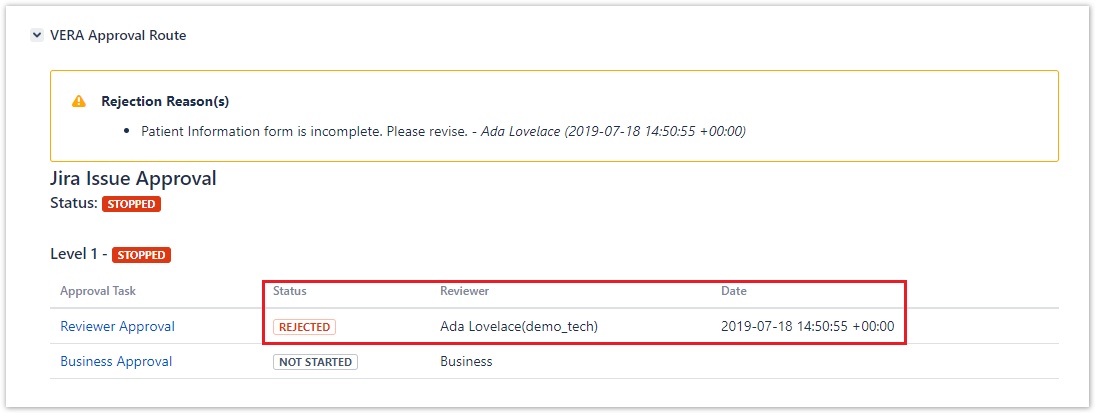
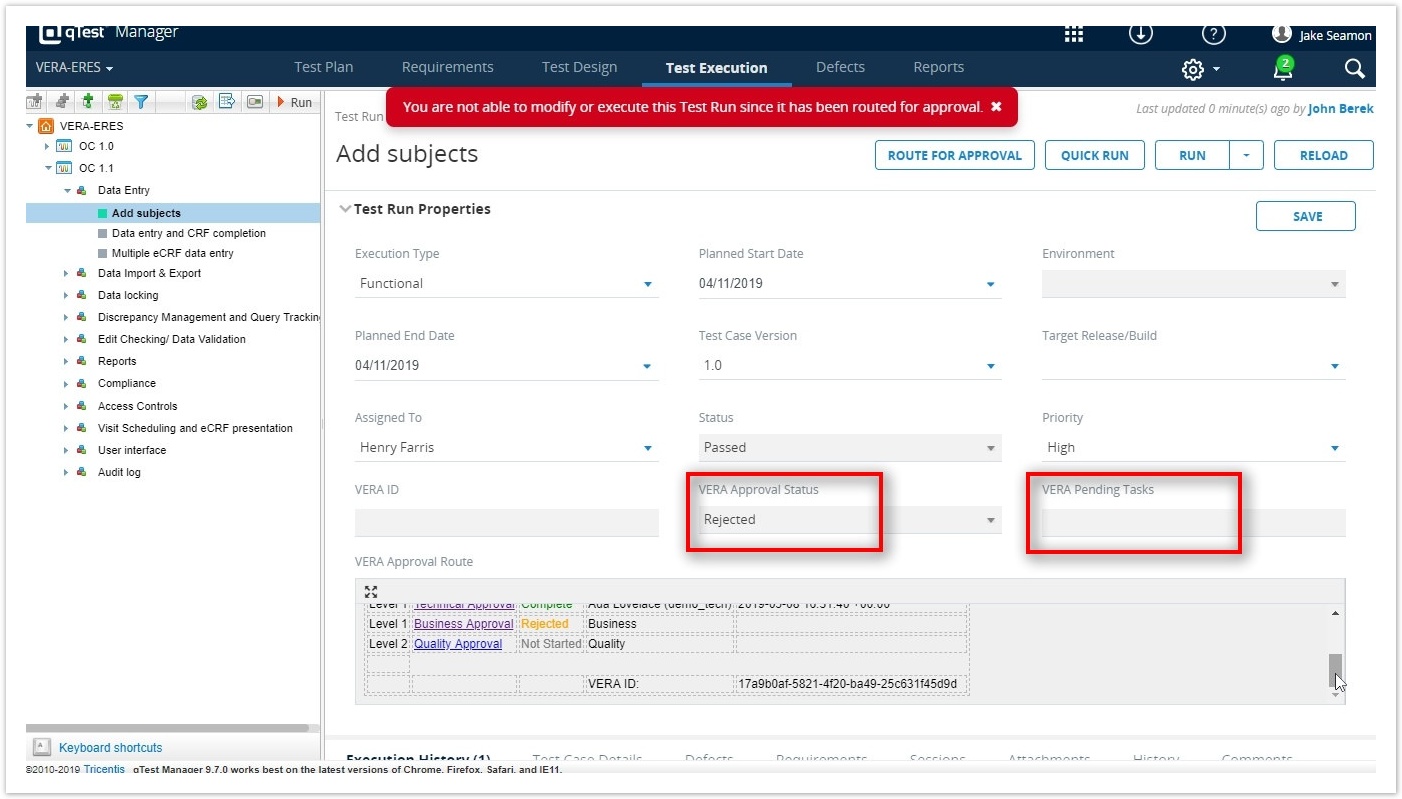
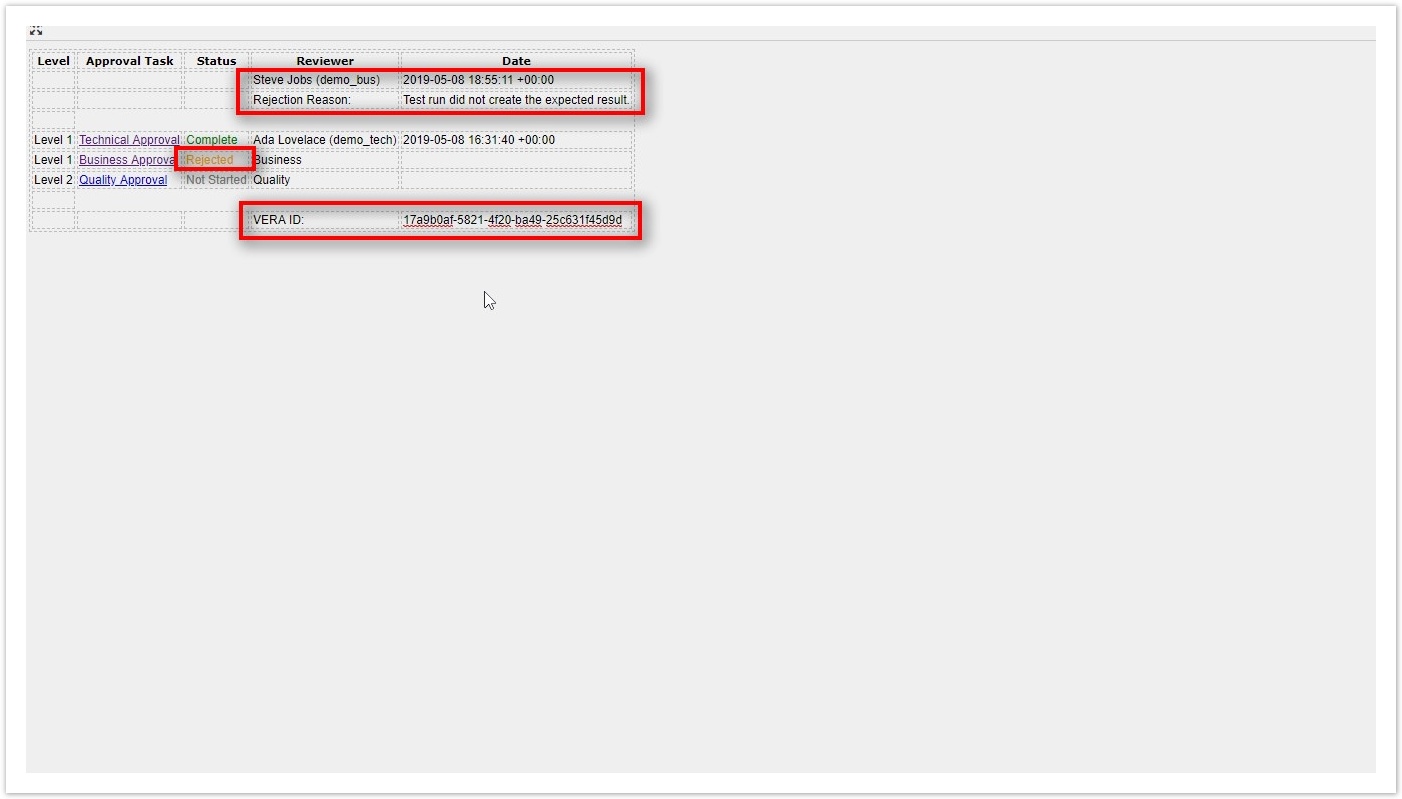
- The Status of applied signatures is updated to Rejected
- The Reviewer column is populated with the full name and user ID of the individual who rejected the record
- The Date is populated with the server time (GMT) and the UTC offset of when the rejection occurred

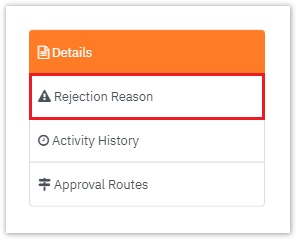
- To view the Rejection Reason(s) in the VERA Web Portal
- Click on the Rejection Reason tab on the left navigation bar
- The Rejection Reason(s) Details view for the record will be displayed

- Click on the Rejection Reason tab on the left navigation bar
System of Origin Rejection Results
For individual System of Origin results, click your system below:
| Tip |
|---|
If the Rejection status and Rejection Reason do not immediately appear in the System of Origin, try to refresh or reload the page. This will often cause the status update to display properly. |
| Expand | ||
|---|---|---|
| ||
|
| Expand | ||
|---|---|---|
| ||
|
Related articles
| Filter by label (Content by label) | ||||||||||||||||||
|---|---|---|---|---|---|---|---|---|---|---|---|---|---|---|---|---|---|---|
|
| Page Properties | ||
|---|---|---|
| ||
|
Table of Contents
Table of Contents maxLevel 2