Using the Signature Verification Utility
The utility is accessed by selecting the Verify Signatures button at the bottom of the VERA Action Menu. By default, Policy Administrators, Requirement Administrators, Test Administrators, and Defect Administrators can access this utility. 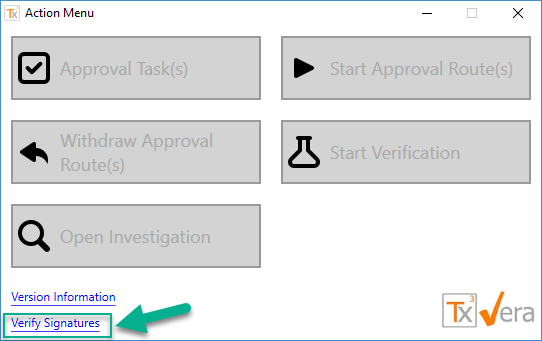
Figure: The Verify Signatures button is located at the bottom of the VERA Action Menu, under the Version Information button.
After selecting the Verify Signatures button, the user will be prompted to confirm that they intend to verify all electronic signatures in the project.
WARNING: Verifying electronic signatures is a time-intensive process. The required time is dependent on the overall size of the project and also on the number of electronic signatures it contains. The operation may require several hours to complete. 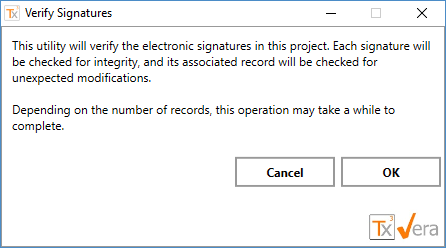
Figure: Confirmation prompt for the Signature Verification Utility.
Pressing Cancel in this dialog will immediately exit the utility. Pressing OK will begin the signature verification operation.
As the operation runs, two progress bars will display. The top progress bar reports the overall progress in terms of the total number of record types that must be verified and the number of record types that have been verified so far. The bottom progress bar indicates the progress within the current record type by displaying the total number of records in that type, and the number of records that have been verified so far.
A Cancel button is also provided so the user can cancel the operation at any time. 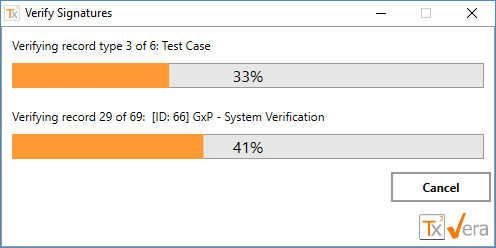
Figure: The progress view shows the overall progress and the sub-progress by record type. Pressing Cancel will immediately abort the operation.
When the operation completes, the user will see a summary of view of the results. This view will report:
- The number of records that were discovered to have electronic signatures (either active or inactive).
- The number of electronic signatures that were discovered.
- The total number of electronic signatures that passed verification.
- The total number of electronic signatures that failed verification.
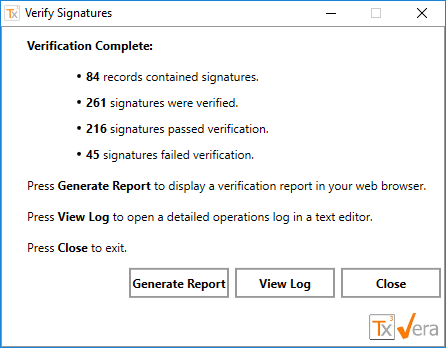
Figure: When the operation completes, a summary of the results is displayed.
Three actions are available from this screen:
- Generate Report: Generates and displays a summary report in the user's default web browser. This report can be saved or printed using the browser's native functionality.
- View Log: Opens a detailed operations log in a text editor. This log contains detailed information describing each record that was inspected, each signature that was verified, and results of the verification. The log can be used as a detailed audit report of the verification and also as a troubleshooting tool if errors were reported in the summary.
- Close: Exits the utility.
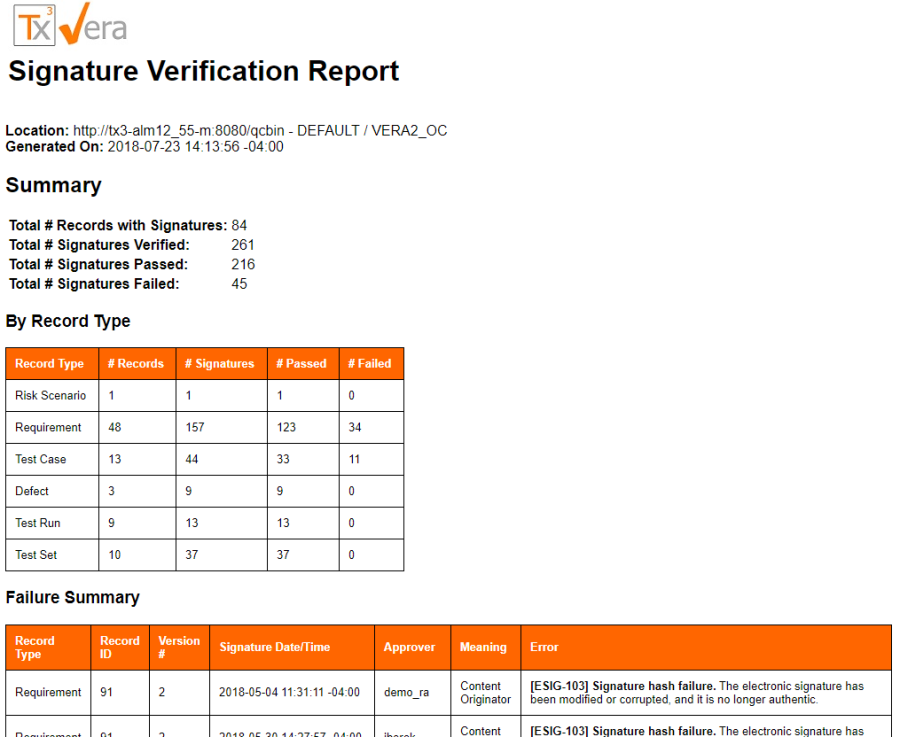
Figure: Pressing Generate Report opens a summary report in the user's web browser. 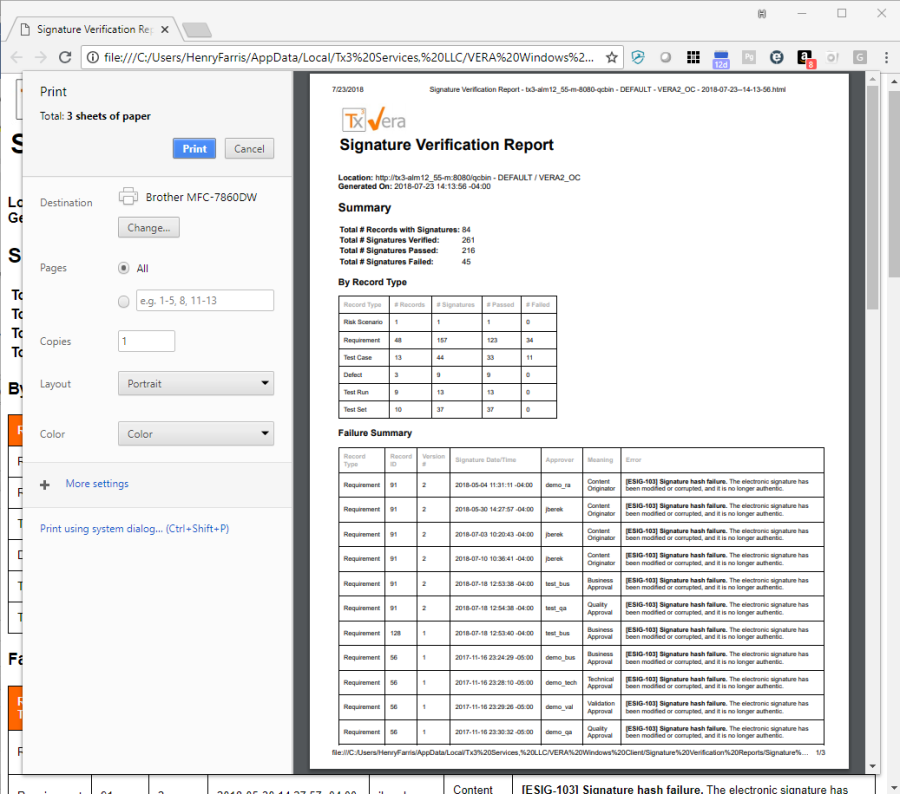
Figure: The report can be saved or printed using the browser's native functionality.