VERA Project Setup
Follow VERA instructions for creating a VERA project for your ALM Version – full or QC Edition. Use the new Tosca enabled Template as the source of the project creation.
Update policy files as directed in the following sections.
Upload Policy Files
- Locate the policy files from the VERA deployment package. (Their names end with .json) Alternatively, copy the Policy files from the Template project.
- Login to Project as TDAdmin or Policy Administrator.
- If this project was created from a template, a message box opens stating "This project is not configured with a VERA Records Management policy. Editing functionality has been disabled. Please contact your system administrator."
- Click Ok to continue.
- Select and Check Out the Requirements folder (root Requirement in the Requirements Module).
- Select the Attachments tab and click the File button.
- The Open dialog box opens, enabling you to add a file attachment to the Requirements folder.
- Select the Approval Policy.json file and click Open to attach the json file to the requirement.
- Click the File button.
- Select Notification Policy.json file and click Open to attach the json file to the requirement.
- Click the File button.
- Select Synchronization Policy.json file and click Open to attach the json file to the requirement.
- Click the File button.
- Select Records Management Policy.json file and click Open to attach the json file to the requirement.
- Upload the "Tosca_Interface.tds" file in the same way.
- Check in the Requirements folder.
- Click the Go toolbar button.
- The VERA Action Menu opens, click the Version Information link at the bottom of the dialog to see the VERA Policy and component versions.
Update the Synchronization Policy
Update the Synchronization Policy file for each VERA project. The Synchronization Policy file contains connection information to the Tosca environment. Specifically, it points to a Tosca Workspace on a Tosca Server.
It is important that values in this file are correct, matching the target Tosca environment's configuration.
Locate the Synchronization Policy.json file from the VERA deployment package, make a copy of the Synchronization Policy file from the provided VERA template, or use ALM's update attachment functionality. A .json file is a text file that contains tagged data. It is similar to, but simpler than, an .xml file. Use any text editor to update the values in a .json file. Be sure to adhere to .json formatting rules.
In order to define Tosca synchronization, there must be a "Locations" element with the following array of name/value pairs defined. Here is an explanation of each of the attributes:
"System": "Tosca",
"Name": "Tx3 Tosca",
"Server": "<Tosca Server URL:Port>",
"Discovery Service Endpoint": "<Tosca Server URL:Port>",
"Client Id": "<Tosca Client ID>",
"Client Secret": "<Encrypted Tosca Client Secret>",
"Workspace": "<targetWorkspaceNameOnToscaServer>",
"Service Account": "<ToscaAdmin-LevelUserName>",
"Service Password": "<encryptedToscaAdminPassword>",
"Workflow Lock Group": "<ToscaAdmin-LevelGroupForLockingItems>",
"Workflow Unlock Group": "<ToscaUserGroupForUnlockingItems>",
"REST Retries": "<Retry Value>"
Server: Enter your server URL and Port for the Tosca REST Server. Note: first, confirm that the Tosca REST service is installed and operational.
Discovery Service Endpoint: Enter the Tosca Discovery Service Endpoint URL and Port as defined in the Tricentis Service Configuration. Note: Specified when Client Id/Client Secret authentication is enabled.
Client Id: Enter the Tosca Client Id as defined in the Tricentis Service Configuration. Note: Specified when Client Id/Client Secret authentication is enabled.
Client Secret: Enter the Tosca Client Secret as defined in the Tricentis Service Configuration after encryption. Note: Specified when Client Id/Client Secret authentication is enabled.
Workspace: Enter the workspace name, created on the Tosca server, that points to the correct Tosca Repository
Service Account: Enter a special User belonging to a Tosca Admin group that can change group ownership of items. See above.
Service Password: The password for the Service Account. Encrypt with the Tx3 VERA Password Encryption Utility; see above.
Workflow Lock Group: A special group that is only for Admins. This is a group to use when an item is locked against updates. NOTE: be sure this group exists in the target Tosca project. e.g. The group ownership of a Test Case is changed to "ALM Lock", so that the user community can no longer make updates.
Workflow Unlock Group: A special group to which non-admin users belong. This group is assigned as an item's group ownership when an item is to be unlocked and open for editing. Be sure this group exists in the target Tosca project. If managing multiple VERA projects in a single Tosca Repository, make sure this value matches the Group name in Tosca. For example, if the Repository is named "Technology", and two VERA project groups are using the same repository, "Remedy" and "Documentum", have a "Remedy" group in Tosca for the VERA Remedy project and have this value also be "Remedy". (This also enables the two project teams' Tosca objects to be hidden from each other, if desired.)
REST Retries: In some slower environments, contention issues may arise. If encountering repeated REST errors, increase this value to have the system issue increased retry requests.
Update each value accordingly. If following these instructions in order, the Tosca Server Workspace, the Workflow Lock Group, the Workflow Unlock Group, and the Service Account/Password should already be created. Enter the correct values for these fields.
One additional item remains for this file's update – encrypt the Service Account Password. Typing the password in clear text will not work.
Encrypt the Service Password with the VERA Encryption Utility
Encrypt the Service Password using the "VERA_Password_Encryption_Utility", found in the Release Package. Follow these steps to encrypt the password. Update the Synchronization Policy File with the encrypted "Service Password" – see below.
NOTE: you can use a single Service Account/Password across multiple Tosca Servers and/or Repositories. However, the account must exist in each Tosca repository.
- From the VERA package, unzip the 'VERA_Password_Encryption_Utility_x.x.x.zip file
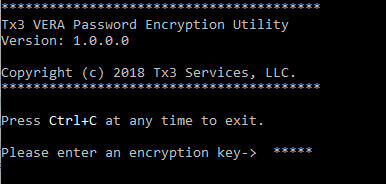
- Start PasswordEncryptionUtility.exe
- Enter an encryption "key". This is a sequence of characters used to encrypt and decrypt the target password. Make sure you keep that key safe and in a known place in case it needs to be referenced at a later time.
- Enter again, for confirmation
- Enter the target password to encrypt, and again, for confirmation
- The password is copied to the clipboard and can be pasted into the Synchronization Policy file. See below.
- Press Ctrl/C to exit the utility program
- In the Synchronization Policy file, paste the encrypted string into the value for the Service Password:
- In the "Locations" node/array, for the "Service Password" element, paste the encrypted password between the quotes, as the value for the Service Password.