Create the VERA System Role
- Mary Nghe
Prerequisites
The VERA service account must be created prior to creating the VERA system role.
The VERA System role will be utilized to restrict approval and rejection transitions from Routing for Approval to just the VERA service account. This role should only contain the VERA service account and should not be assigned to any other users.
There are three options for setting up the VERA System Role in Jira:
- Create a project role
- Create a Jira user group
- Create an external group (in Active Directory, etc.)
As long as the approval and rejection transitions from the VERA Routing for Approval status is limited to only the VERA service account, the configuration will be compatible with VERA. The Jira admin can choose whether roles or groups are the most convenient in your environment. The guide below describes how to create the VERA System Role as a project role.
Step-by-Step Guide to Create the VERA System Role
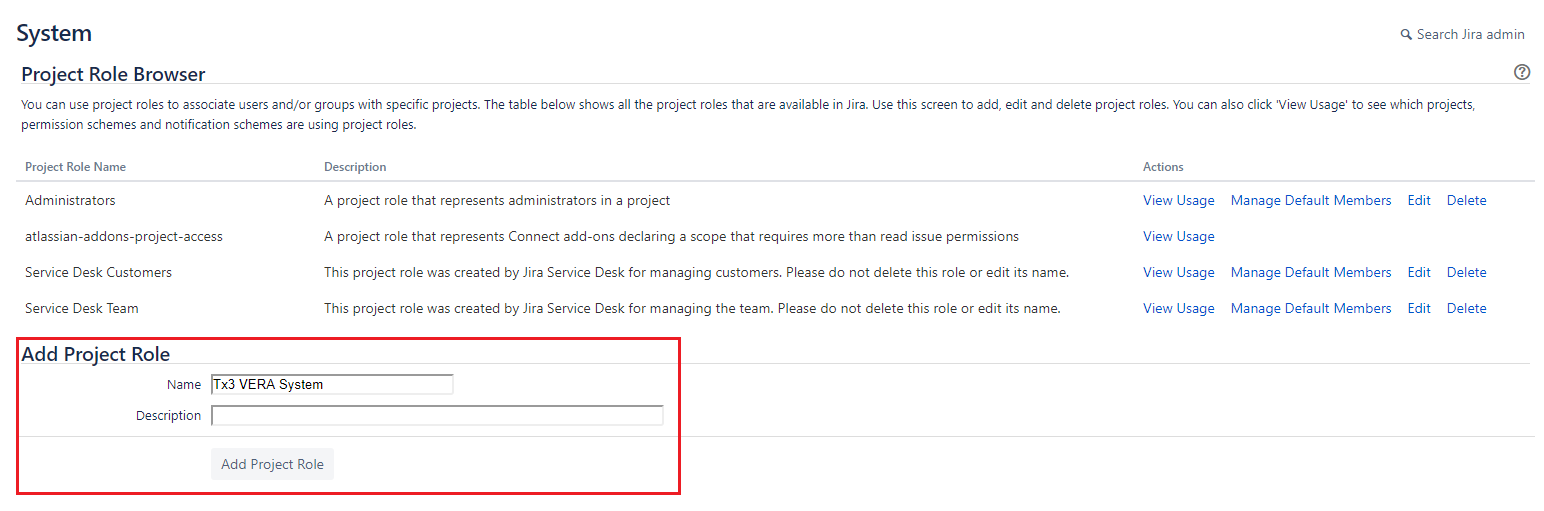
- Navigate to the Jira Administration Settings > System > Project Roles
- Add a Tx3 VERA System Project role and click Add Project Role
- Once added, under the Actions column, click Manage Default Members
- In the Default Users column, click Edit
- Add the VERA service account as a default member
- For any existing projects that are converted to VERA, manually add the VERA service account to the VERA System role.
- For any newly created projects, the VERA service account will be added by default, and can be removed if VERA will not be enabled on that project.
- Alternatively, the default configuration could be reversed for new projects. The VERA System role can be specified as opt-in rather than opt-out.